
Let’s get started with setting up your Ally Solos Glasses in a few simple steps.
If you haven’t already, make sure to download Ally on your phone.
Use the buttons below or follow these steps: if you have an iPhone, open the ‘App Store’.
If you have an Android device, open the ‘Play Store’ app.
Now search for: ‘Ally - Accessible AI Assistant’. Download and open the app.
If you already have Ally installed, make sure the app is up to date. You can check if it's on the latest version by going to Ally on the App Store / Play Store and checking if there is any new update.

Once you open the ally app, go through the onboarding by tapping on ‘Let’s start’.
If you already have an account, sign in instead by tapping on ‘I already have an account’.

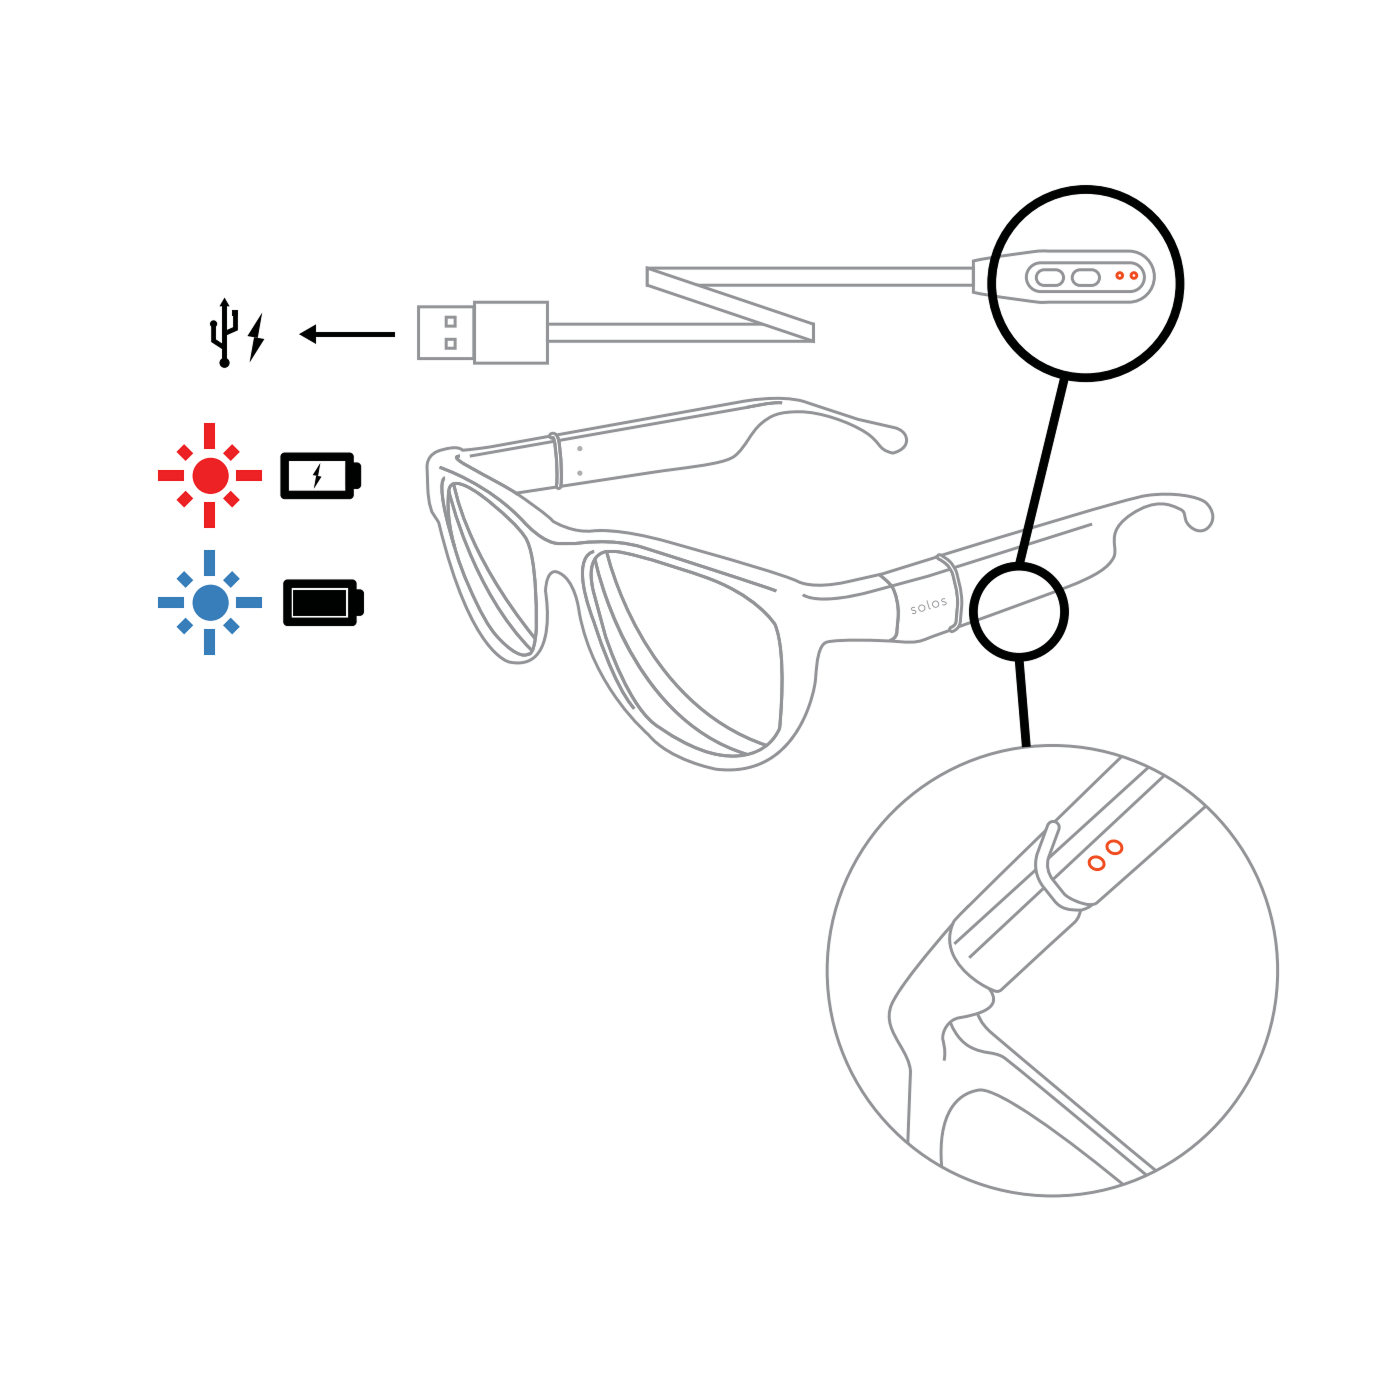
Once you receive your Ally Solos Glasses, ensure that both battery stems (the glasses arms) are securely attached to the frame. This is important for everyday use and for charging the glasses correctly.
If there is a charge in the glasses, you will hear “power ok” or “power high” when touching the power bump. The power bump is located on the outside of the right battery stem, near where the arm connects to the frame.
If your Ally Solos Glasses have no charge, remove both battery stems from the frame and charge each stem directly using a USB-C cable for at least 15 minutes. After charging, carefully reattach each stem to the correct side of the frame, ensuring they are firmly and securely connected.
If your Ally Solos Glasses already have some charge, you can use the magnetic USB charging cable included in the box. The magnetic charger snaps onto the docking pins on the left arm of the glasses, near where the arm connects to the frame. This method charges both battery stems at the same time.
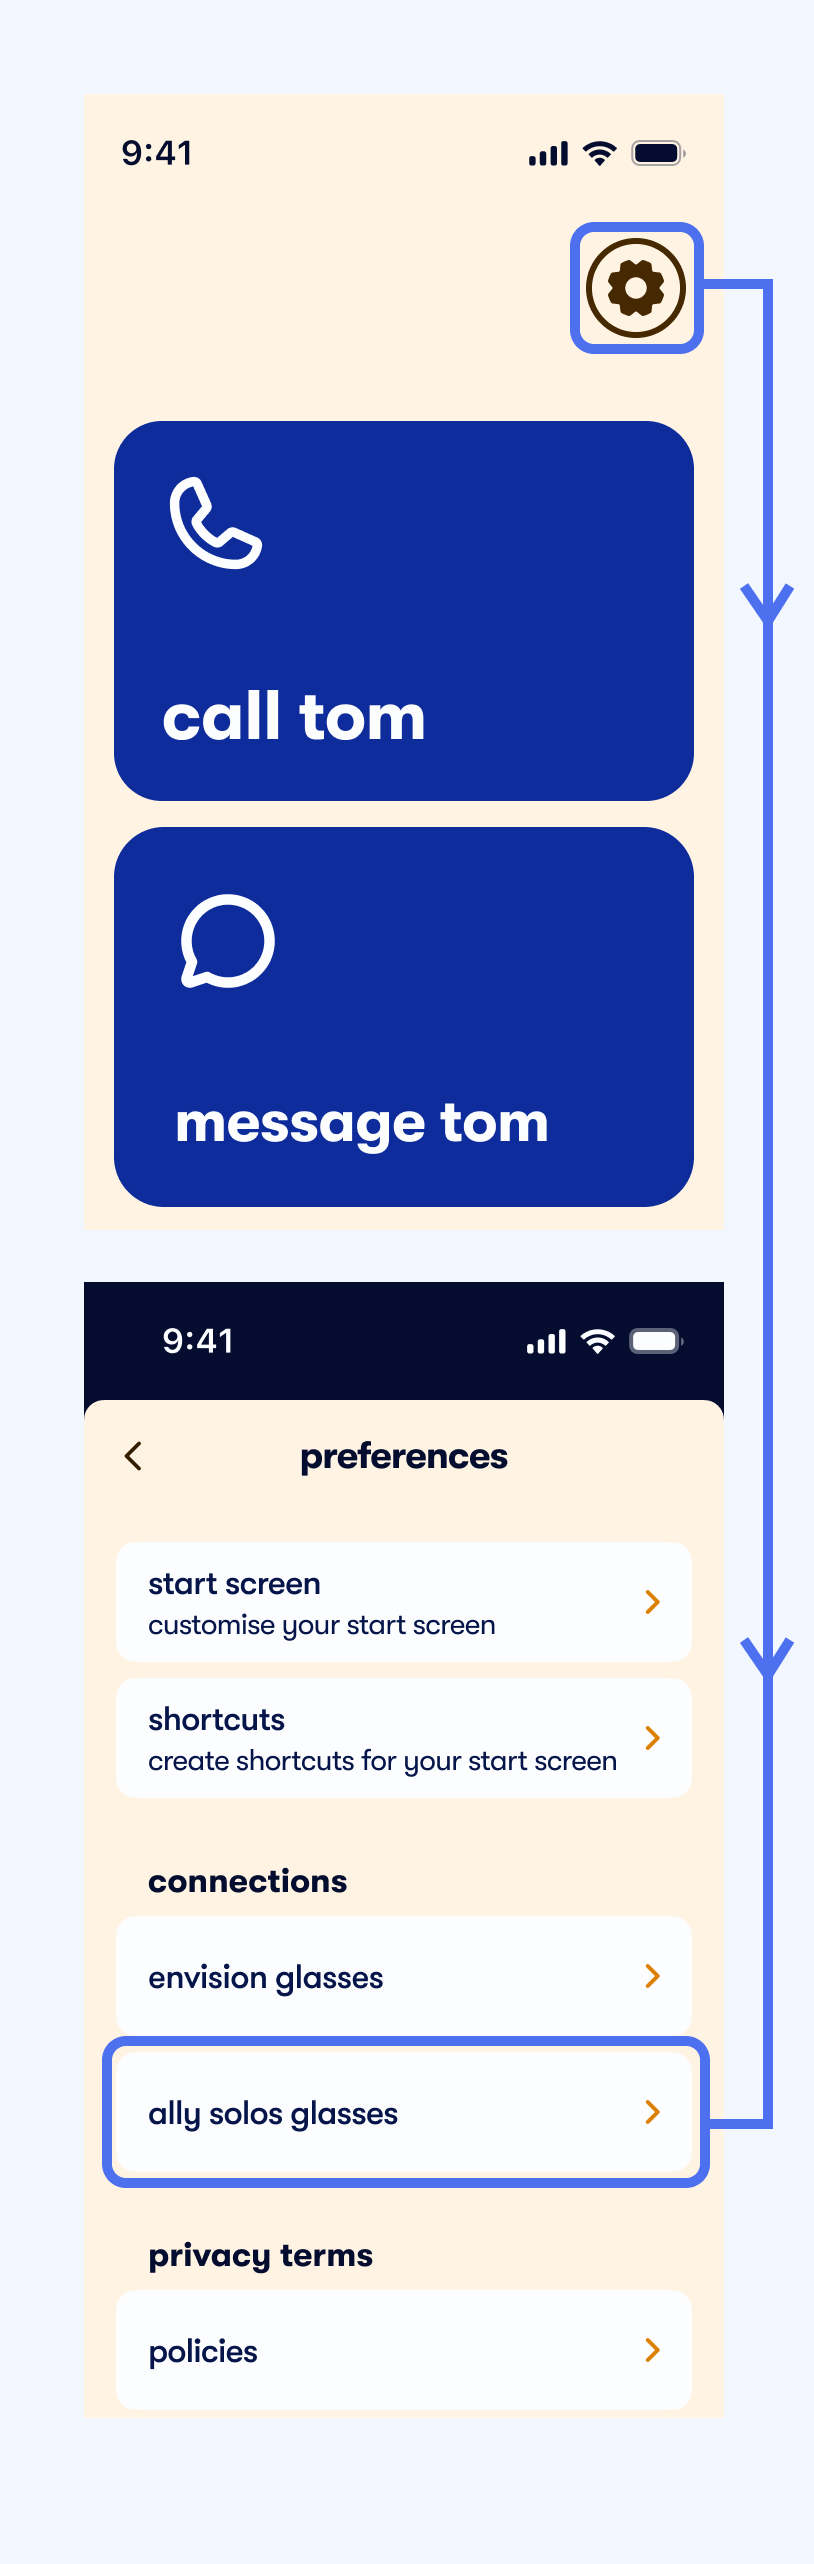
After being signed in, on the start page click on the ‘Preferences’ icon.
After opening the preferences screen, scroll down until you see a section called ‘connections’.
From the connections section, tap on the button where it says ‘Ally Solos Glasses’.
Once you click on it, the pairing flow can be started.
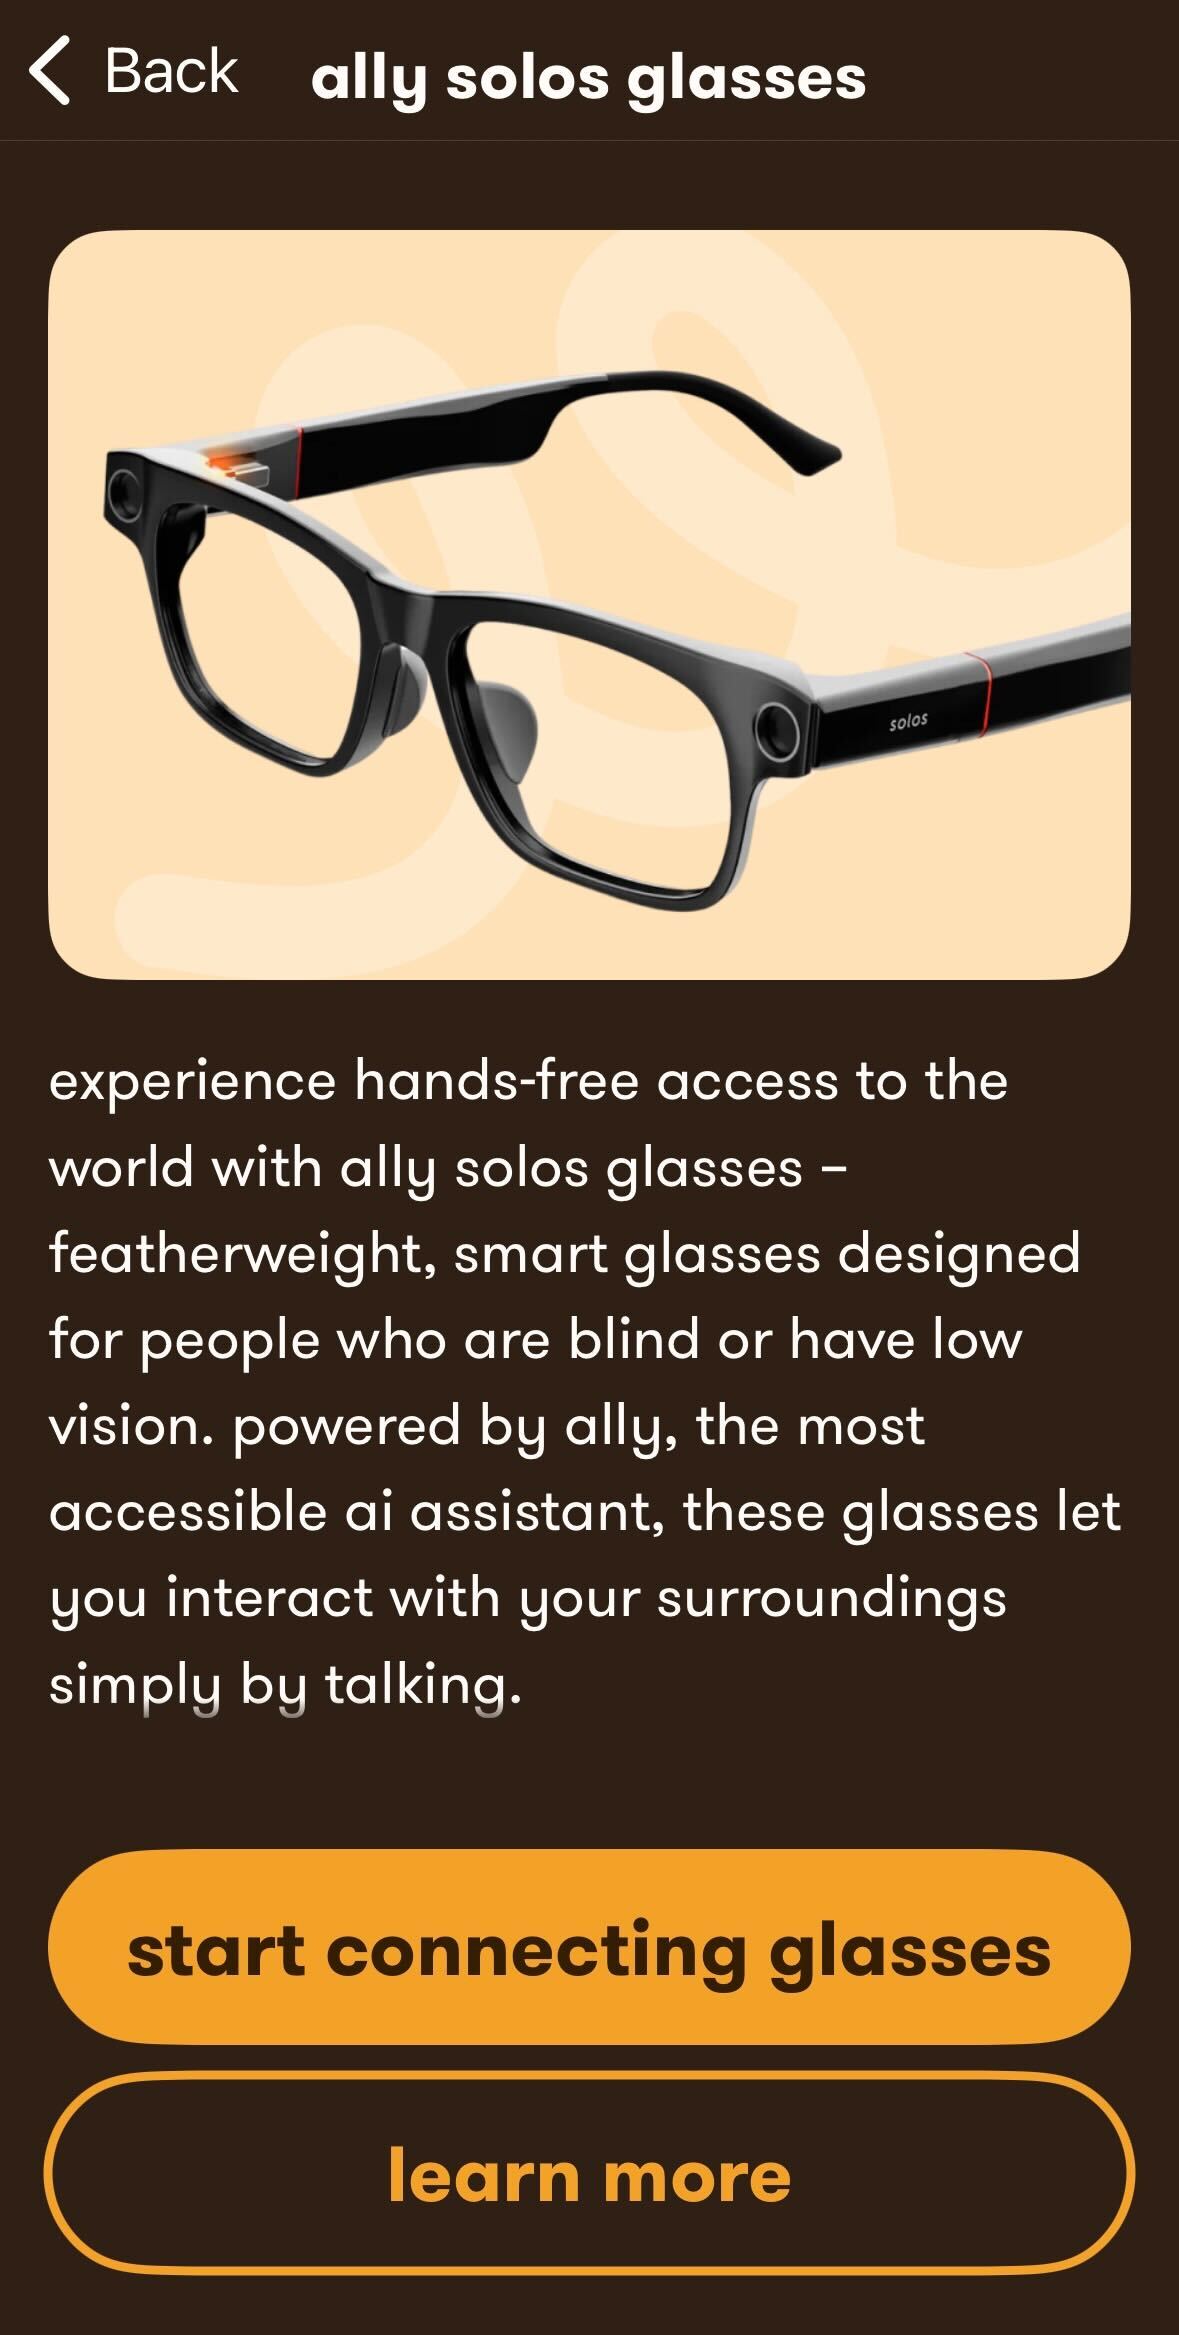
After tapping on Ally Solos Glasses, you will be presented with a screen where you can start the connection and onboarding with your Ally Solos Glasses.
Tap on ‘Start connecting glasses’ and follow the steps.
Once you're done connecting your Ally Solos Glasses to the Ally App, you will be prompted to go through a simple onboarding flow that explains all the gestures and how to use the glasses. We recommend following through it step-by-step if you have not used these glasses before.
After you’ve finished the onboarding you can start using Ally on your Ally Solos Glasses.
You can also refer to our detailed Ally Solos Glasses User Guide here.
If somehow you still run into issues, our customer support is always ready to answer your questions. Simply send email to support@ally.me

© 2026 Envision. All rights reserved.


